DIY Embroidery-Hoop Photo Frames!
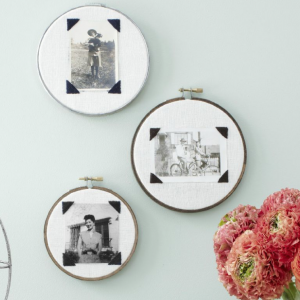
Jessica Marquez gives black-and-whites extra charisma in this idea from her book, Stitched Gifts ($19.95; Chronicle).
Step 1: For each of your prints, select an embroidery hoop that’s slightly larger than the photo: a seven-inch-diameter hoop for a 3×5; a nine-inch-diameter hoop for a 4×6 (for similar hoops, from $2.09 for 7″ diam.; ).
Step 2: Cut a square of pale-hued fabric (Marquez used linen) that’s two inches larger than your hoop’s diameter; cut a same-size square of fabric stabilizer (Pellon Stitch-N-Tear, $7.99; 12″ x 10-yard roll; ). Stack the fabric atop the stabilizer, then center and mount both in the hoop.
Step 3: Center your photo atop the mounted fabric and secure in place with small pieces of Scotch tape along all four sides. Working 1/8 inch out from the photo, use a ruler and a water-soluble marker (Dritz marking pen, $4.99; ) to draw a 1/2-inch-by-1/2-inch “L” shape around each corner.
Step 4: Using black satin thread, and working from the ends of each “L” to its corner, stitch from side to side, within the lines, to create a triangle. Take care not to sew through your photo.
Step 5: Remove the tape. If any pen marks are visible, wipe them away with a damp cotton swab. Trim any excess fabric at the back of the hoop. Repeat to make a wall’s worth of memories.