DIY Rain Barrel for Water Conservation
Americans are using more water every year. In fact, according to the Environmental Protection Agency, the average family uses 320 gallons of water per day and that could swell up to 1,000 gallons in the summer. Fortunately, there is an effortless way to reduce our water footprint and water bills.
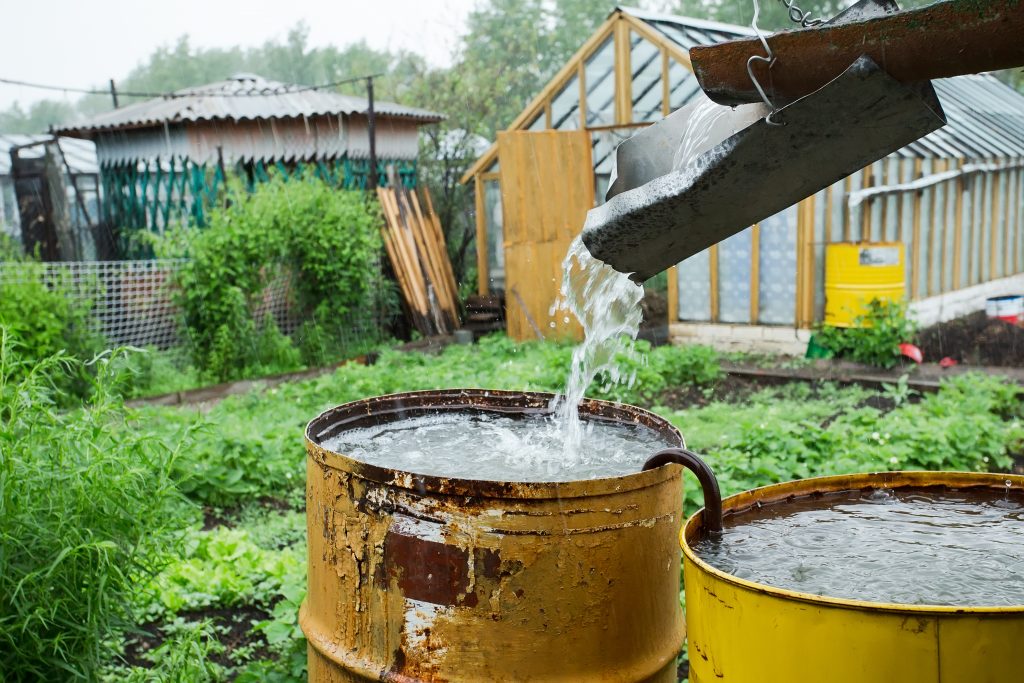
Rain barrels collect water with the help of a downspout coming from the roof or gutter, directed into the barrel through a diverter. The water is filtered through a screen that covers the top, catching any debris. You can then use the water for plants, gardens or even to drink in a drought. All in all, these barrels are one the most efficient ways to save water at home.
Luckily, you can make and install a rain barrel in as little as one hour.
Materials & Tools
- Rain barrel
- Drill
- Hacksaw or utility knife
- Spigot
- Rubber & metal washers
- Hose clamp
- Waterproof Sealant
- Landscaping fabric
- Extra downspout material or diverter
- Pencil
- Measuring tape
Rain Barrel Installation
- Determine the location of your rain barrel, preferably right under a downspout. Then, place it on a flat, raised surface. You can use cement blocks or bricks.
- Remove the rain barrel from the raiser and place it sideways on the ground. Drill a hole towards the bottom, on the side of the barrel. This is where you’ll remove water from the rain barrel. The hole should be a bit smaller than your spigot hole.
- Add both metal and rubber washers to your spigot.
- Apply waterproof sealant around the rubber washer. Place inside the hole and hold in place for 20 seconds.
- Reach inside the barrel and add a rubber and metal washer onto the other end of the spigot. Some homeowners add a hose clamp if they experience heavy storms. This ensures the spigot will hold in place.
- Cut an entry hole on top of the barrel. This is where your downspout or diverter will go. The hole should be just big enough for the diverter to fit. You can use a hacksaw or utility knife to cut.
- Drill two exit holes, on the sides of the barrel, towards the top. In case your rain barrel is filled, these holes will release some of the water and unnecessary pressure.
- Cut enough landscaping fabric to fit over the rain barrel. This fabric will prevent mosquitos, leaves and other debris from entering the rain barrel.
- Open the lid and place the cut fabric over the open rain barrel. Close the lid. The fabric should be sticking out of all ends just a bit.
- Cut your downspout so it can be placed inside the rain barrel.
- If you’re adding a diverter, measure the diverter and saw off your downspout as needed.
- Attach the diverter as instructed.
- Place the connecting tube to the port and place in the rain barrel.
- Test the system by pouring water into your gutter from a ladder. Always have someone hold the ladder. If water is not entering the rain barrel, there is likely a blockage or hole in the gutter or downspout.
Rain Barrel Prices
Beyond all the benefits of a rain barrel, they’re also inexpensive. While you can go to your local hardware store and buy all the necessary parts and tools, you can also purchase rain barrel kits for less than $200. In fact, a 55-gallon standard rain barrel kit can range from $100 to $150, depending on the style.
Water Conservation
Did you know that only 1% of the water on our planet is safe, drinkable water? In fact, we can live up to two weeks without food but only days without water. Rainwater is the best water you can use for your plants. Treated water from your hose has salts and chemicals that are tough on plants. Rainwater has nutrients and minerals that your garden will love. As you can see, collecting water from a natural resource doesn’t only save you money and improve your health, but it also protects and conserves our environment!