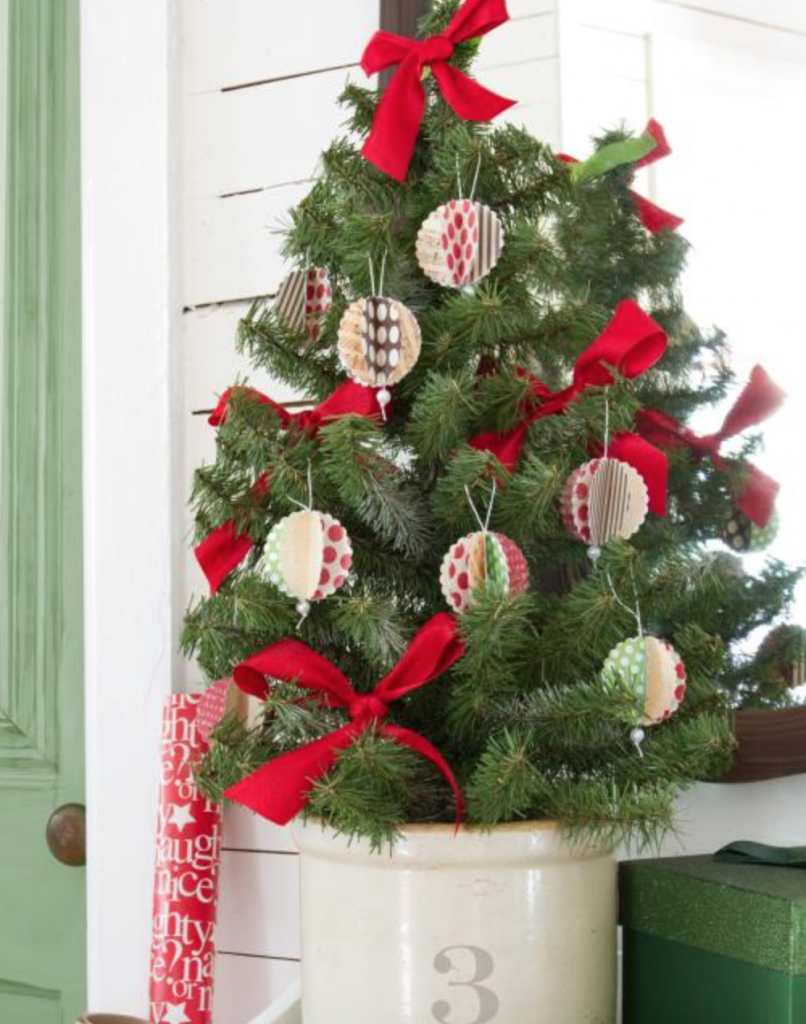
Turn patterned card stock into three-dimensional ornaments in just 7 steps. Match the papers’ colors and patterns to your home’s decor or choose holiday-specific patterns and use the paper ornaments, instead of a traditional bow, to top wrapped gifts.
Choose a variety of decorative, patterned card stock. Use a large, scallop-edge paper punch to cut seven circles out of different patterns of card stock.
Fold all seven paper circles in half, decorative side in.
Use repositionable adhesive dots or double-sided tape to adhere all but one of the circles together, wrong side to wrong side.
Thread Pearl and Knot Twine
Use a sewing needle to thread a 8″-10″ piece of thin twine through a craft pearl or decorative bead. Create a triple knot below the craft pearl or decorative bead to secure it.
Apply a line of adhesive dots or double-sided tape along the seam of the last folded circle.
Position the pearl or bead at the bottom edge of the scalloped circle and create a loop with the rest of the twine. Push down on the twine so that it sticks to the adhesive or double-sided tape.
Glue Circles Together to Create Ornament
Apply more adhesive dots or double-sided tape to the half circles on the left and right side of the twine. Stick the last two half-circles together to secure the twine then glue all seven circles together, wrong side to wrong side, and hang completed ornament on a tree using the loop at the top.
| Haultail | Demo Bags |